


This guide explains how to enable the Reward balance expiry feature in Webplanex Wallet, but it requires a plan upgrade.
By enabling Reward balance expiry, you can manage your program's budget and encourage customer activity. Choose the expiry duration or custom settings that best align with your program's goals and target audience.
Eligibility:
This feature is likely not available on the basic or startup plan. You'll need to upgrade to a Medium or Advanced plan to access it.
Enabling Expiry:
Navigate to Settings: Locate the "Settings" button on the navigation bar within the Webplanex Wallet app.
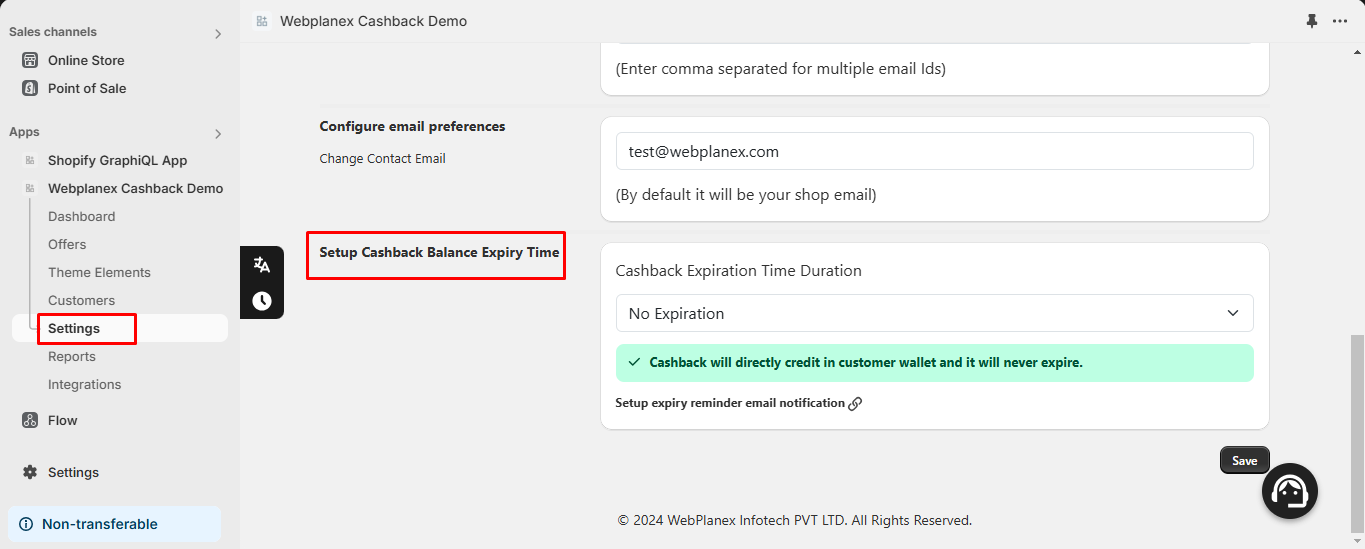
Reward Expiry Section: Within the settings menu, look for a section related to "Setup Reward Balance Expiry Time".
Here you can see several predefined expiry durations. Choose the desired timeframe for your Reward to expire after it's credited to customers.
- 30 days
- 2 months
- 3 months
- 6 months
- 1 year

Custom Expiry Settings (Optional):
If you select "Custom Date Settings", you can define specific dates for crediting and expiring Reward. Choose the desired timeframe for your Reward to expire after it's credited to customers
- Set a start date for crediting Reward to customer wallets.
- Set an end date for when the credited Reward will expire.

Auto-Repeat Expiry (Optional):
There is an option like "Does the expiration date need to be repeated after it has passed?".
Enabling this option would set the expiry duration to automatically restart after the chosen timeframe elapses. This can be useful for recurring crediting scenarios.
Important Note:
The expiry calculations are based on Webplanex Wallet's server time. Be mindful of the time zone difference to avoid unintended expiry times.