
First of all Thanks for Installing "GST Invoice India" for your GST Billing Needs.
There are some basic steps which need to be taken before start using the application.
1. Navigate to Settings and you will see some tabs in top like Store Information, Location and etc.
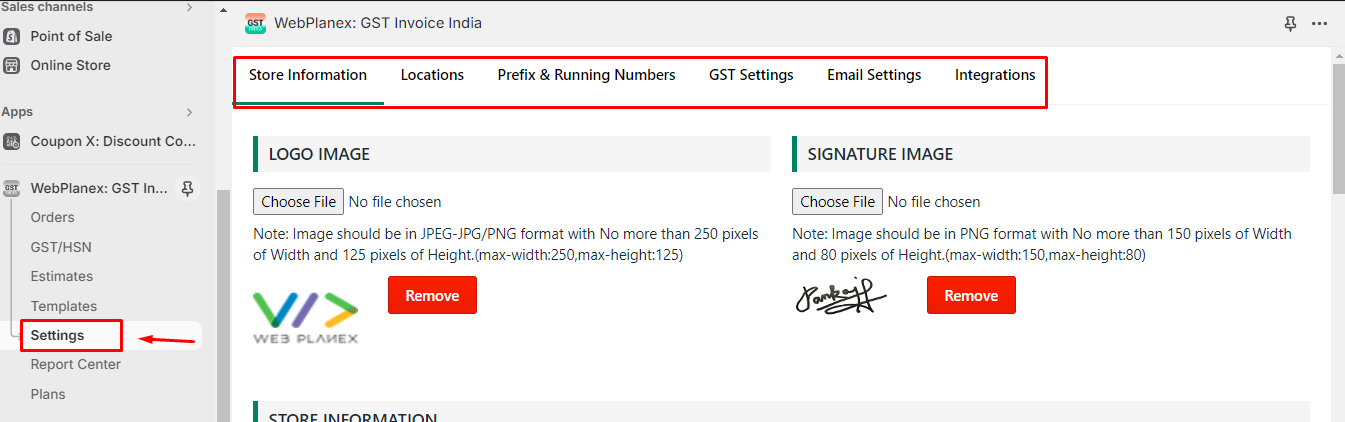
2. Add your Store related information in this area, check each section on this tab and add details of your store. Once done Click Submit button at the bottom of the tab/page.
3. Navigate to the Location tab, this is ONLY for the store which fulfills orders from Multi-Location. Here all your locations added on the Shopify Admin Location section will be displayed. If any location is missing click on the "Location Re-sync" button.
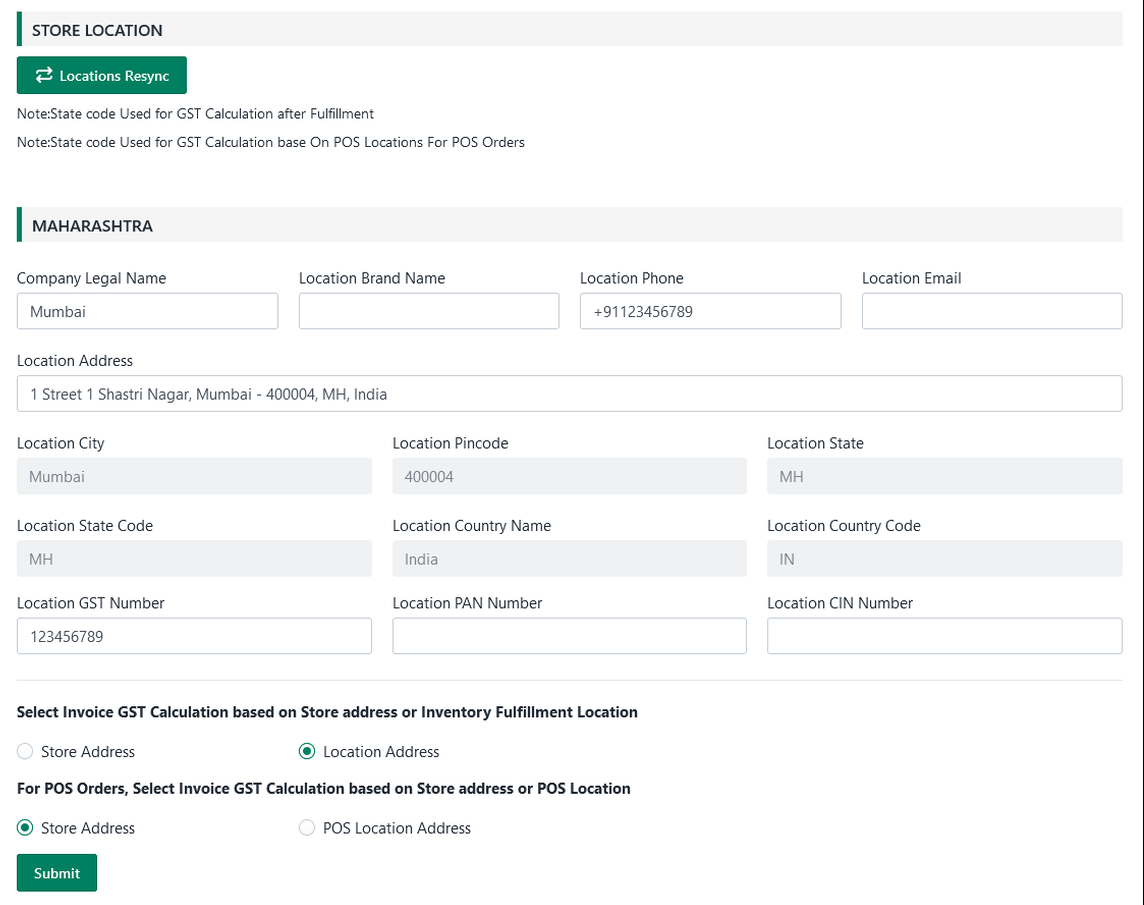
Make sure if you fulfill orders from multiple locations on Shopify set the radio button to "Location Address". In this case, GST Calculation will be done based on Location Address and CGST/SGST or IGST will be decided.
4. Then next step is to set your invoice Prefix & Running Numbers. Here you can add Prefix to the invoice and set the Number from which you want to start your invoicing. Something like "WP/21-22" in prefix and 001 in number. So for the very first order, it will give invoice numbers like WP/21-22/001.
For all bills, i.e. (Credit Note, Estimates and etc..) Prefix and Running Numbers can be managed from here.
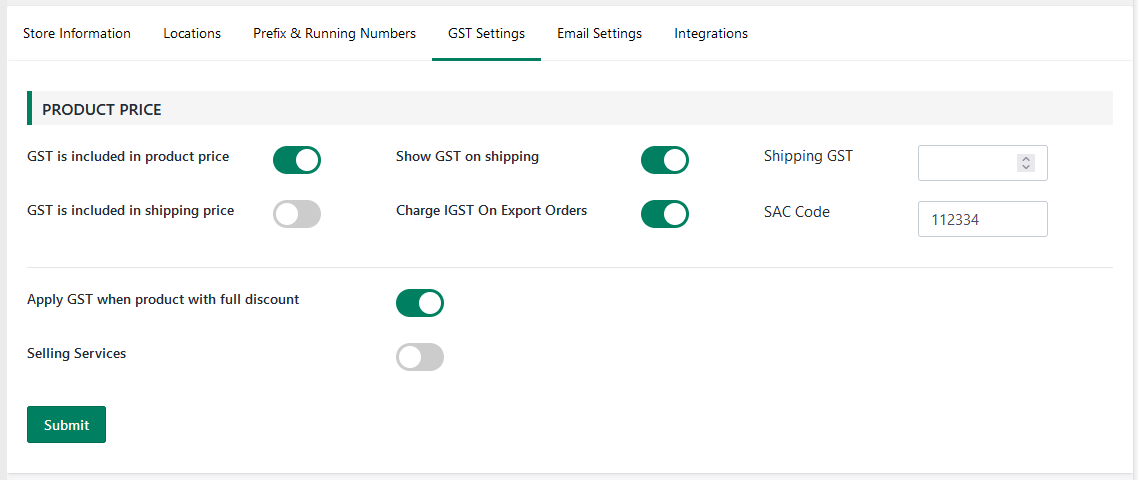
5. Now click on the next tab i.e. "GST Settings" This is the most important part and from here you can set how you set Product Price On Shopify,"Price includes tax" or "Price is excluding tax" based on these settings system will do calculations. Even you can configure Tax on Shipping from here.
6. Then click on Email Settings from here you can control how you want your users to receive GST invoices and how you as an admin want to get invoices. Its self-explanatory, so set options as per your requirement.
7. Last Step in Setting up application settings is Integration. If you want your customers to fill in their GST Number and Company name while purchasing a product you can enable this. This section is majorly for B2B clients so if you just have a B2C setup you do not need to worry about it.
Also, this is the tricky part and you need to place codes we have shown in your theme files like instructions given on the page, If you are not sure please contact us on Live Chat and give access to your stores which support person ask for and he will get your code added.
Also, note that the B2B code can not be added to Checkout Pages due to Shopify limitation. It can be available on the View Cart page.
In this section itself, one more integration option is there which is useful for stores that do not partially fulfill orders. You can add the ability to send a PDF invoice to your customer via email itself.
While doing this setting if you have any questions do not hesitate to contact us on Live chat. We will help you out with all your doubts.
Now, we request to proceed to the last step which will make your settings complete. And you can start using the application for your next invoice. Go to Next Article